
Your personal account is your control center for your project and profile. Here you can update your personal details, change profile settings, connect integrations, manage your plan, and view your transaction history.
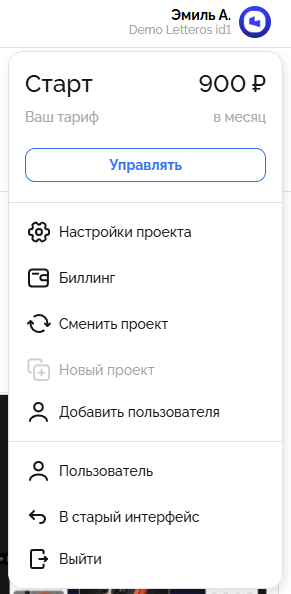
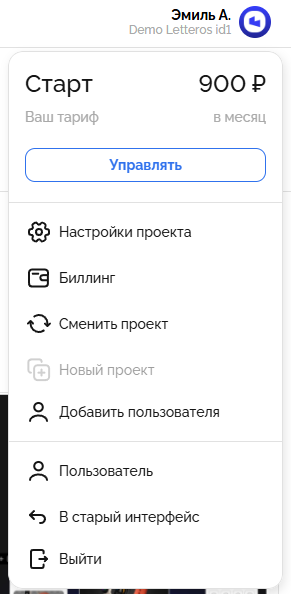
You can open your personal account by clicking your profile photo in the top-right corner of the screen, then selecting "User" from the dropdown menu.
Navigation is handled through the side menu, where sections are grouped as follows: "User", "Project Settings", "Integrations" and "Billing".
The "User" section
This section is for managing the user's personal information.
Here you can update your first name, last name, phone number, and job title, as well as add a profile photo that will display within the account.

Main profile fields:
• User photo — uploaded in JPG or PNG format.
• First and last name — used for internal identification.
• Email — tied to the account and used to log in.
• Phone — required contact information.
• Job title — an optional field, filled in if desired.
After making changes, click "Save" to apply them.
Password reset:
On the right is a separate "Reset Password" block.
Enter the new password twice and click "Save" — the update takes effect immediately. This is convenient if you need to quickly change your password without logging out of your account.
The "Project Settings" section
This section stores all the main settings for the current project. This is where you configure the visual and organizational information: logo, name, company website, and industry.

Available settings:
• Logo — upload your brand image; it will display within the project.
• Project name — used in the interface header.
• Company website — if you'd like, you can specify your project's site domain.
• Team size and Industry — reference information used for analytics and support.
Company information
Below is a block with the organization's legal details: tax ID, registration reason code, bank identification code, checking and correspondent accounts, legal address, and contact information — this data is filled in when the project is created and is used on invoices and acts.
The "Integrations" section
In the integrations section, you can connect external services for exporting templates and campaigns.Our platform supports standard connections via FTP, S3, Webhook, as well as API integrations with CDP and ESP systems.

Available platforms: Mailganer, SendPulse, Mailchimp, Unisender, Sendsay, ExpertSender, GetResponse, Yandex, AltCraft, and others.
If your platform isn't on the list, you can click "+ Request an integration" and submit a request for a custom connection.
For technical users, there are fields for container data, region, API keys, and SSL settings.
The "Payment and Documents" section
The "Payment and Documents" section handles plan management, balance, and payment history. Here you can check your subscription status, top up your balance, and download invoices and acts.

My Plan
On the "My Plan" page of the "Payment and Documents" section, the following are displayed:
• Plan— shows your current plan, status (active / paused), validity date, and limits on emails and users.
• Balance— shows your current balance and lets you top it up directly.
• Pricing table — you can review detailed information about each plan, choose a plan, and pay for a month, quarter, or year, getting a corresponding discount
• Transaction history — records all changes to your plan: activations, renewals, pauses. Clicking the "Show all" link opens the full list of transactions.
• Documents — here you can upload or download acts, invoices, and other payment-related documents.
History

This section records all changes to your plan: activations, renewals, pauses.
Documents

Here you can download acts, invoices, and other payment-related documents.
Next section — How to Create Your First Email