
Once you've registered and chosen a plan, you can start creating your first email. In Letteros, this is simple — no coding or complicated settings required.
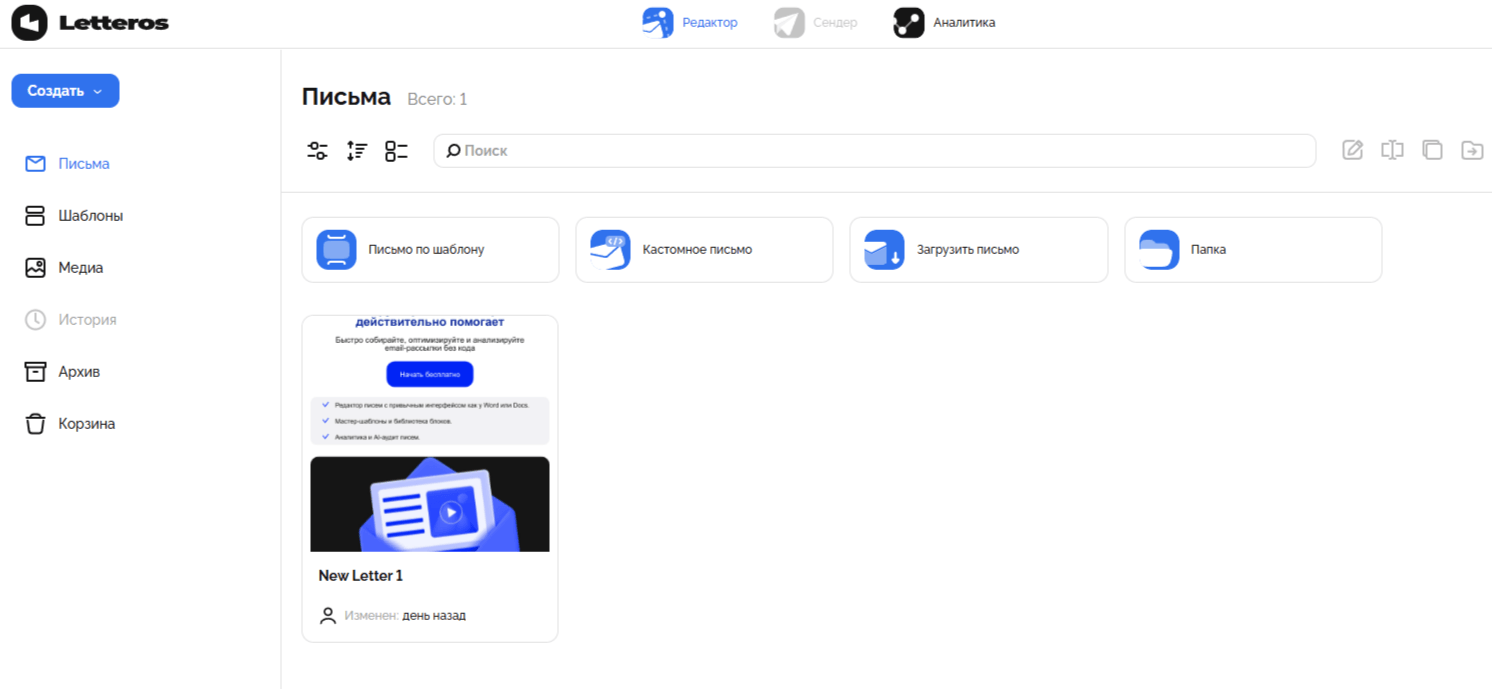
— Go to the "Emails" section on the main page.
— Choose how you want to create it.

This is where all your created emails are displayed. Above the list, next to the search bar, are quick-create buttons, along with the main "Create" button, which lets you start a new email or choose a suitable option from the available templates.
After clicking it, four ways to create an email will appear:
• Email from a template — use a ready-made, branded structure from the Letteros library and adapt it to your project: swap in your own text, images, and colors while keeping the branded style intact.
• Custom email — start from a blank canvas and build your email using code.
• Upload an email — import ready-made HTML or ZIP files.
• Folder — create a new folder to organize your emails.

The same actions are available as quick buttons under the search bar or above the email list:
Email from a template
This is the most convenient option for beginners. You take a ready-made structure and adapt it to your needs — no code and no complicated settings required.
Below, we'll build an example email on the topic of electronics:
1. Click "Email from a template".
2. Choose a suitable template (for example, one with an image, a headline, and a button) and click "Create".
3. Once you've chosen a template, the editor will open.

Example: a "Wireless Headphones" promo email in the editor
So here we have a blank canvas — the foundation of your future email. We'll now fill it with content step by step: adding a logo, a banner with a description, a call-to-action button, and styling everything consistently.

Below is an example newsletter for an electronics store promoting the new AirPods Pro 3. You can use this scenario as a template and swap in your own content for your needs.
Goal: header with logo → banner with headline and description → separate "Buy" button linking to the product.
1. Adding the header (logo)
• in the editor, click "+" above the canvas, or drag the Image block onto the canvas.
• double-click the image — the image window will open.
• click "Replace" and upload your company's logo.

2. Adding spacing
• Open the "Dividers" section.
• Add a divider to create some breathing room between the logo and the main content. Dividers come in different heights — choose the spacing that fits.

3. Adding the banner
• Go to the "Banners" section and add the option you want.
• Make sure everything is center-aligned.

4. Setting up fonts
• Select the banner's text — the headline and description.
• By default, Arial is the most commonly used font for emails — it's universal and displays correctly in most email clients. In our example, though, we'll be using Trebuchet MS.
If needed, you can connect a custom font through support (a feature in demo mode; not all fonts are available).

5. Changing the banner image
• Double-click the image → "Replace" → upload the headphones image.
• In the "Link" field, you can specify the product page address, so clicking the image takes users to the site.

6. Editing the banner text
• Headline: AirPods Pro 3
• Description: Adaptive audio, improved noise cancellation, and precise head tracking — maximum immersion for music, movies, and calls.
• Change the text color (for example, white or black, depending on the background).

7. Changing the banner background
• Click an empty area of the block to open the section settings panel.
• Change the background color, picking something with contrast (for example, light gray, black, or blue).

8. Rounding the banner corners
• In the same settings, find the "Corner radius" option.
• Set the value to 50 — you'll get a neat card-style block.

9. Adding the buy button
• Go to the "Buttons" section → select "Button" and drag it below the banner.

• In the alignment settings, select "center."

• Button text: "Buy at our store".
• Apply the same font (Trebuchet MS) to keep things consistent.

• Change the button's background to white: click the block's background → open "Background color" → choose white.

• Go to the "Border" section and set a black outline.

• Insert the link to the product.

10. Adding the footer
The footer is a required part of every email. It usually includes contact information, social media links, and an unsubscribe button. Let's add one to finish the email and give it a polished look.
• Go to the "Footers" section and choose option 2 — it works well for standard promo emails.

• Add a bit of spacing between the button and the footer: hover over the top edge of the block and increase the distance.

• Click an empty spot inside the footer to open the block settings.• Remove any extra content — in our case, that's the "Social 2", "Social 4" elements and the "Web version" link.

• Change the font in the footer to match the one used in the rest of the email (in our case, Trebuchet MS), to keep the style consistent.
• Reduce the size of the "Unsubscribe" link — that way it stays visible without drawing attention away from the main content.
As a result, we've got a clean, concise promo email:logo → divider → banner with image and description → call-to-action button.
An email like this works well for promo campaigns, new product launches, and sale newsletters. If you'd like, you can add a block below with key benefits, additional products, or support contact info.

The next section is Testing the email